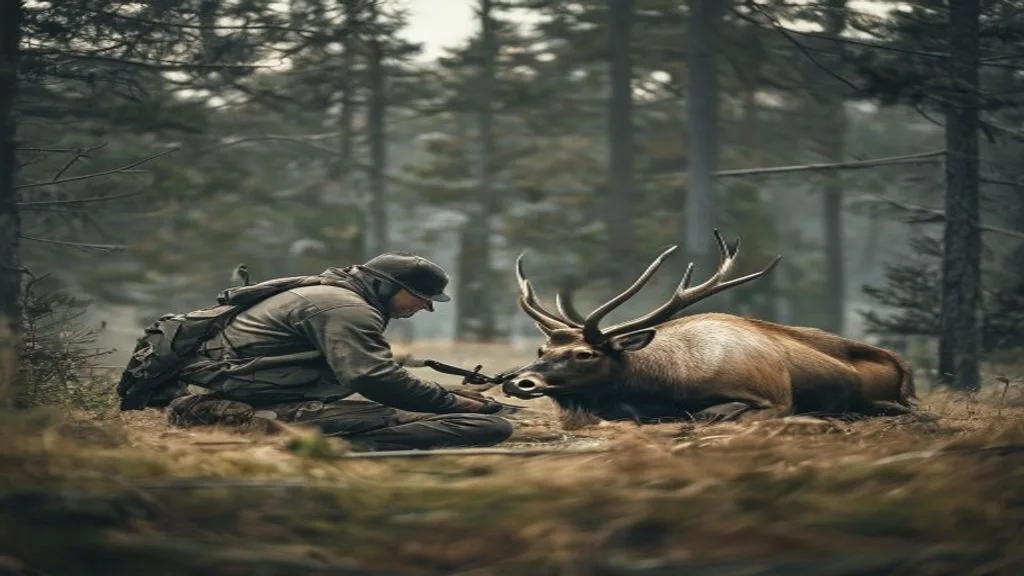
I didn’t sleep the night before my first elk hunt. Not because I was excited (well, partly that), but because somewhere around 11 PM I realized I had spent months thinking about getting the elk, and almost zero time thinking about what happens after. Like, the animal is down. Now what? It’s just you, a 700-pound animal, and a knife you’ve never really tested on anything bigger than a chicken breast.
That’s the part nobody romanticizes in the hunting videos. They cut straight from the shot to the hero photo. Nobody shows you the two hours of kneeling in the dirt, arms elbow-deep, trying to remember which YouTube tutorial said what.
So here’s what I actually learned — pieced together from asking way too many questions, making some genuinely embarrassing mistakes, and eventually getting it right enough that the meat was salvageable and honestly really good.
Why Field Dressing Matters More Than You Think
Here’s the honest truth I didn’t understand at first: field dressing isn’t just a chore you do before the real work. It is the real work. The whole point of hunting is the meat (at least for me), and if you mess up the field dressing, you’re basically cooking with spoiled ingredients before you even get home. Heat is the enemy. Bacteria move fast. An elk is enormous — the body cavity holds heat like a Dutch oven.
Think of it like this: imagine buying the most expensive cut of beef you can find, then leaving it in your car on a warm afternoon for three hours. That’s what happens when you drag your feet on field dressing. The clock starts the moment the animal goes down.
I only really understood this after reading through What I Learned About Field Dressing Game Meat (After Almost Ruining My First Deer) — and honestly, a lot of the principles carry over directly to elk, just scaled up significantly.
What You Need Before You Start
Sharp knife. Non-negotiable. A dull knife here isn’t just annoying — it’s actually more dangerous, because you end up forcing cuts instead of controlling them. I use a simple fixed-blade, nothing fancy. (I’ve seen people bring a whole rolling toolkit and I privately think that’s overkill, but whatever works.)
Beyond that: latex or rubber gloves (two pairs — trust me), a small bone saw or heavy knife for the pelvis, some rope for repositioning the animal, and a headlamp if there’s any chance you’re working in low light. Which, if you hunted at dawn, there’s a decent chance you will be.
Field Dressing an Elk Step by Step — The Actual Process
Step 1: Position the animal
Get the elk on its back if you can. This is harder than it sounds with a 600-700 pound animal, which is why rope is useful — tie the legs to nearby trees to keep it propped open. The goal is gravity working for you, not against you.
Step 2: Start with the skin cut
You’re opening up the belly, but here’s the part that tripped me up the first time: you do NOT want to puncture the stomach or intestines. The smell is one thing. The contamination is the real problem. So you pinch the skin, lift it away from the organs, and make shallow cuts. Use two fingers as a guide if it helps — like a tent, keeping the blade pointed slightly upward and away from the gut.
Start from the breastbone and work your way down to the pelvis. Take it slow here. Seriously. This is not the place to rush.
Step 3: Open the chest cavity
You’ll need to cut through the diaphragm — that thin membrane separating the chest from the abdominal cavity. Reach in and cut it away from the ribcage all the way around. Then you’re reaching up into the chest to get the lungs and heart. The heart, by the way, is worth saving. Elk heart is genuinely one of the better things I’ve eaten in the last two years, and I say that as someone who was skeptical going in.
Step 4: Split the pelvis (or go around it)
Some hunters split the pelvis with a bone saw to make it easier to remove the lower intestines and bladder. Others carefully work around it. I’ve done both. Personally, I find splitting it cleaner — less chance of nicking the bladder, which would be a very bad day for everyone involved.
Remove the bladder carefully. Tie it off if needed before you pull. Again — this is not a place to be impatient.
Step 5: Roll everything out
With the cavity open and the connections cut, you’re essentially rolling the organs out of the body. Gravity helps here if the animal is positioned right. Reach in, sever any remaining connective tissue, and let it all come out in one movement if possible.
Step 6: Cool it down, fast
Prop the cavity open with sticks. If you have access to water, rinse it out. Get air moving through there. In colder temperatures, this happens naturally. In warmer weather — early season especially — you need to work faster and think about how quickly you can get the meat to a cooler or processor.
This is also where the size of elk becomes humbling. A deer, you can maybe drag out yourself. An elk? You’re quartering it in the field most of the time, which is a whole separate skill set I’m still working on honestly.
The Mistake I Almost Made (And You Might Too)
I almost skipped gloves the first time because I forgot them in the truck and didn’t want to walk back. Don’t do this. Not just for hygiene — elk can carry chronic wasting disease in some regions, and direct contact with spinal or brain tissue is something you genuinely want to avoid. (This is one of those things where I wish someone had just said it plainly to me early on, rather than buried in a footnote.)
Also — if you’re new to hunting and still figuring out whether guided hunts make sense for you, I found I Had No Idea What I Was Getting Into With Guided Crossbow Hunting — Here’s What Changed My Mind genuinely useful for thinking through what guides actually help with. Field dressing is one of those things a good guide will walk you through in real time, which is worth a lot when you’re panicking over a downed animal.
One Opinion I’ll Stand Behind
People debate whether you need to “skin in the field” versus waiting. My honest take: in warm weather, skin as soon as possible. The hide holds heat in like insulation. In cold weather, it can protect the meat during transport. But if you’re unsure, err toward getting the hide off. The downside of skinning early is minimal. The downside of meat spoiling is obvious.
And if you’re someone who’s still early in your hunting journey — still figuring out species, seasons, logistics — I’d say start smaller than elk. Not because elk is impossible, but because the margin for error is smaller when the animal is this big. States That Actually Deliver for Spring Turkey Guided Hunts (From Someone Still Figuring This Out) is a good starting point if you want to build skills before going after something this size.
Field dressing an elk is one of those things that sounds overwhelming until you’ve done it once. Then it’s just work — hard, messy, satisfying work. The first time I got it right and actually brought home clean meat, it felt better than the shot. Which surprised me. But maybe it shouldn’t have.
Pertanyaan yang Sering Diajukan (FAQ)
How long do I have to field dress an elk before the meat spoils?
In cool weather (below 40°F), you have a bit more flexibility — maybe a few hours. But in warmer conditions, you really want to open that cavity within 30-60 minutes of the kill. The body holds heat for a long time, and bacteria don't wait around.
Do I need a bone saw to field dress an elk?
Not strictly necessary, but it makes splitting the pelvis much easier and cleaner. Some hunters go around the pelvis entirely, but if you're new to this, a small folding bone saw gives you more control and reduces the chance of a messy mistake near the bladder.
Can I field dress an elk alone, or do I need help?
You can do the field dressing itself solo — it's awkward but doable. The harder part is repositioning a 600+ pound animal and then quartering and packing out the meat, which is where a second person (or a horse, or good pack frames) makes a real difference.